How to create a Test Project in Visual Studio (h4-13)
Visual Studio offers very good tools to automatically test the code easily. However, setting this up is somewhat complicated: Dependencies must be defined, internal classes must be made visible, the versions must be correct, … That’s why I’ll show it step by step with lots of screenshots.
Create a test project
As an example, we could use a simple C# console project. I’ll use the code from post Defining Classes in C# instead. This code is available as HexaFourV02 on GitHub and can be easily downloaded to the local computer.
The sample code contains a “GameState” class for which we want to write automatic tests.
To be able to implement tests, a project must be added to the program code in Visual Studio. What is a project? You may not have noticed that the program currently consists of exactly one project. The Solution Explorer in Visual Studio shows this:
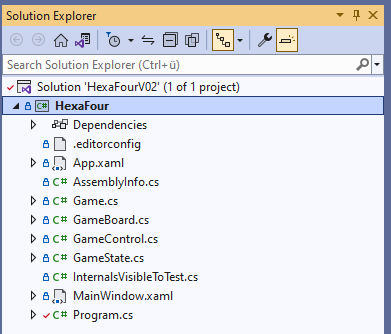
The top line in the Explorer shows the solution, which is called “HexaFourV02” here. The solution currently contains a project called “HexaFour”, which contains the entire program code. However, a solution can contain not just one, but several projects. This is another way of structuring the program code.
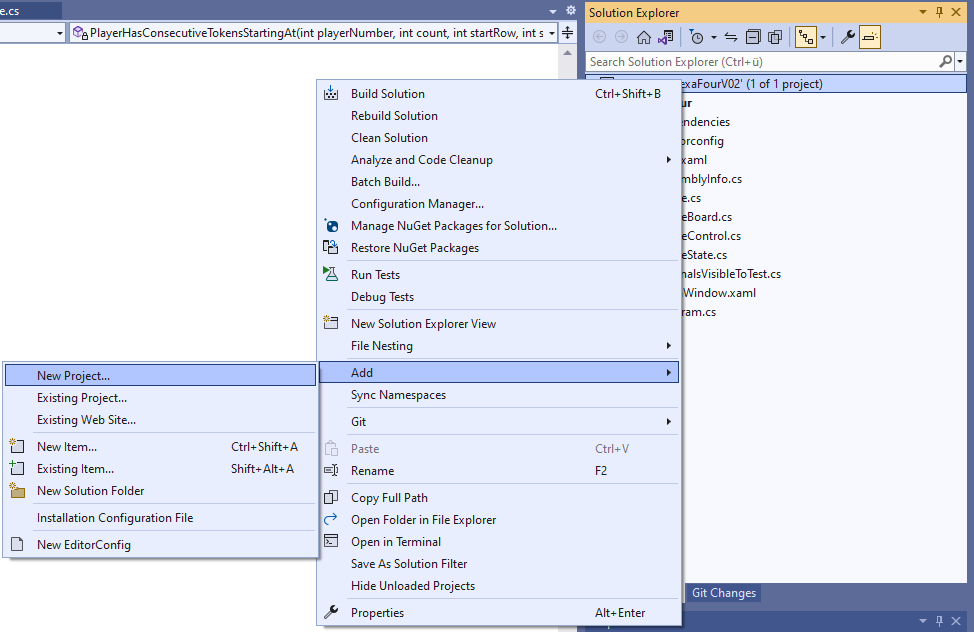
For automatic tests, a test project must first be added. To do this, we call up the menu item for adding a new project in the context menu of the solution:
If we enter the search term “test” in the following mask, different types of test projects are suggested:
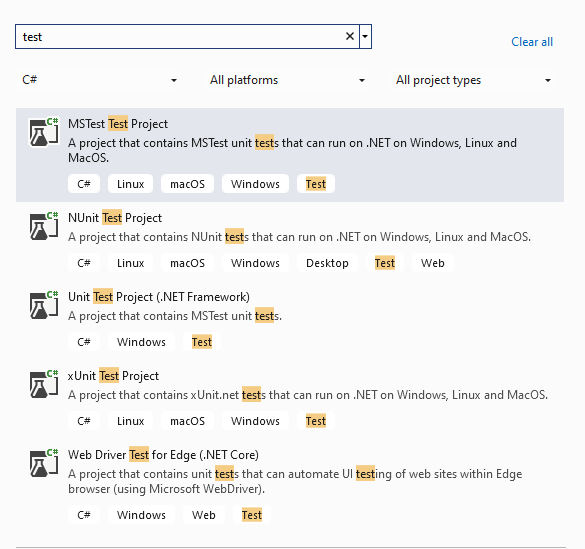
Three of the proposed types are suitable for testing C# .NET backend code: MSTest, NUnit and xUnit. In this post I am using XUnit, but the setup steps for one of the other two test frameworks would be very similar.
After selecting the xUnit Test Project, a new mask is displayed in which a name for the project must be entered::
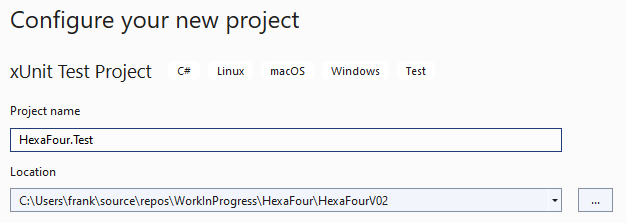
I use the name of the project that contains the code to be tested, in this case “HexaFour”, and add “.Test”. This has the advantage that the project and its test project are always displayed together in the Solution Explorer.
In the next screen, I select the same framework in which my project to be tested is written:

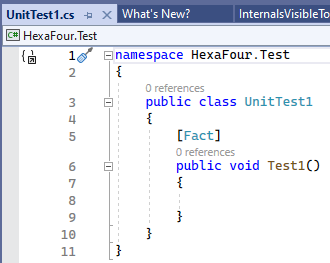
Once the test project has been created, it contains an initial test in the UnitTest1 file:
The test explorer
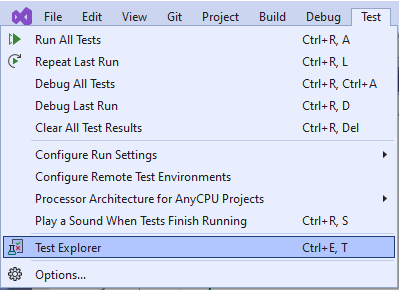
All tests can be displayed and executed with the test explorer, which can be opened via the test menu:
Test explorer automatically finds out which tests are available in the solution and displays them in a tree view. All tests can be executed automatically via the menu item in the top left corner:
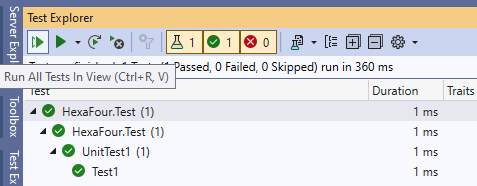
When all tests have been run, it is displayed whether a test was successful (green) or not (red). Because the test “Test1” does not yet contain any code, it is of course green.
Next, we need to configure the test project so that we can use it to test the HexaFour code. To do this, we need to change several settings. In principle, this is done quickly. We take it step by step.
Configure dependencies between the projects
In the first step, we change the test method Test1 so that it uses something from HexaFour. In the following example, we create a new GameState class in the test:

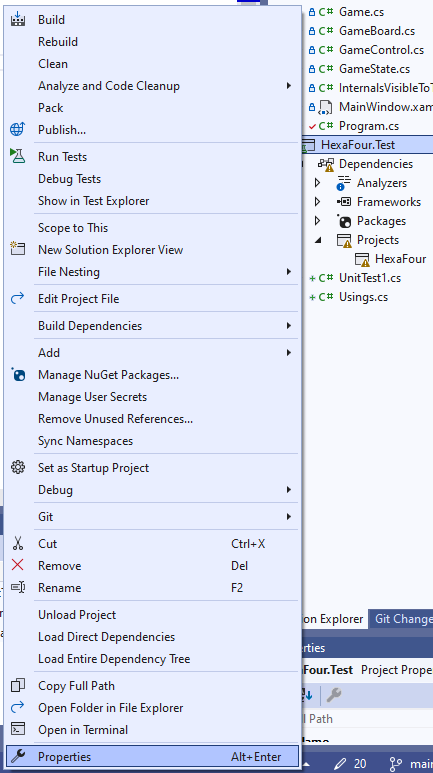
The class name is underlined in red. So something is wrong. If we move the mouse over the location, the above error is displayed. This is because the GameState class does not belong to the test project (HexaFour.Tests), but to another project (HexaFour). We need to specify for the test project that it should use this other project. To do this, we need to adjust the dependencies of the test project:
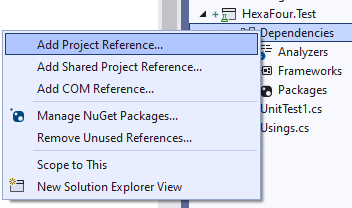
We select the menu item “Add Project References”, tick the “HexaFour” project in the following mask and confirm with OK. The HexaFour project is then displayed in the dependencies of the HexaFour.Test project:
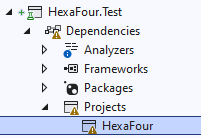
There, a small exclamation mark icon indicates that something is probably not yet right here either.
Customize the targets of the test project
If we build the entire solution via the menu item “Build - Build Solution”, the exact cause of this problem is displayed as an error:

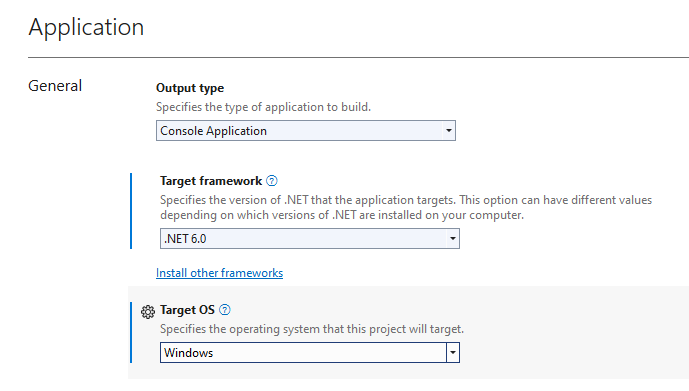
The last two errors in this list indicate the problem: The HexaFour project has “Windows” as the target operating system, so we have to change this accordingly for the HexaFour.Test project. To do this, we open the properties of the test project:
and change the target OS to “Windows”:
Testing internals
There is still one error:
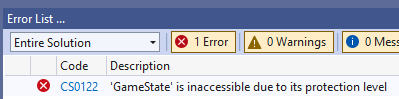
This is because the GameState class in the HexaFour project is defined as follows:
internal class GameState
{
     ...
The internal keyword defines that this class should only be known within the HexaFour project (information hiding). Therefore, the HexaFour.Test project cannot access this class.
We have a problem: On the one hand, the class should remain internal so that it cannot be used from other normal projects. On the other hand, Visual Studio forces us to write the tests for the GameState class in a separate project, which means that this test project does not know the class either.
There is a workaround for this dilemma: We add a file (InternalsVisibleToTest.cs) to the HexaFour project that makes an exception for the test project and lets it use the internals:
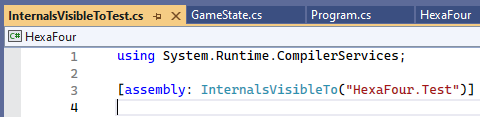
This allows the test project HexaFour.Test access to all internal classes and methods of the HexaFour project. Methods that are defined as private cannot be called from the test project even after this change. This is because private methods can only be used within the class itself.
After this change, Test1 can be executed via the Test Explorer.
One test file for each class
The tests should be structured and named in the same way as the regular classes. In detail, this means:
- The test class for GameState is called GameStateTest
- The GameStateTest class is located in the file GameStateTest.cs
For the first class in our test project, there is a simple way to do it: Visual Studio had automatically created the UnitTest1.cs file. We select this file in the Solution Explorer, open the context menu and select the item Rename, and rename the file to GameStateTest.cs. Visual Studio then automatically changes the name of the test class to GameStateTest.
Now everything is prepared for writing real tests for the GameState class.
The bottom line
There are a few things to consider and set up before the first automated test works. From then on, however, you can work easily and efficiently with automated tests. The next post will continue with a concrete example.
You can view the example used here in HexaFourV03 on GitHub.
TL;DR
This post is part of a series. You can find the previous post here and an overview here.
Visual Studio:
- Setting up a test project is actually easy, but there are a few points to bear in mind: Set dependencies between projects, adjust the target of the test project if necessary, make methods visible to the test via
InternalsVisibleTo. - Test Explorer offers many functions for the management, overview and execution of tests.
Clean Code:
- One test file for each class.
Comment on this post ❤️
I am very interested in what readers think of this post and what ideas or questions they have. The easiest way to do this is to respond to my anonymous survey.